
Apache is the most popular web server software in use today, and it continues to grow in popularity every year. This is evident as Apache provides a robust and secure infrastructure for running websites and applications. Even though Apache has been around for nearly 20 years now, it’s still evolving with new features, enhancements, and bug fixes being added almost daily by its open-source community of volunteers.
Apache Mechanism
Apache is a popular open-source web server software that allows hosts and serves websites. It might be worth having a look at Apache’s working principle:
- A client (e.g., a web browser) sends a request to the Apache web server for a specific URL or web page.
- Apache receives the request and checks if the requested content is available in its cache. If it is, Apache sends the cached content back to the client.
- If the content is not available in the cache, Apache passes the request to the appropriate server-side handler (PHP, Python, etc.) based on the file type.
- The handler generates the content and sends it back to Apache.
- Apache formats the content and sends it back to the client.

Apache Modules
- Modules are a collection of software that can be added to the Apache server to expand its functionality.
- Modules can be installed and uninstalled at any time, without stopping the server.
- Modules are stored in the /etc/apache2/mods-available directory.
- Get activated when they are placed in the /etc/apache2/mods-enabled directory.
Apache Server Alias
Apache server alias is a type of configuration file that allows you to map multiple URLs to the same directory.
Each URL can carry a separate configuration file and you can create as many aliases as you want in each configuration file.
For example:
Alias /folder1  /var/www/images
Alias /folder2  /var/www/images

###This will map both URL to the directory /var/www/images on the file system. Requests to either URL will be served from /var/www/images.
http://example.com/folder1
http://example.com/folder2
This can be useful for providing multiple URLs that access the same resource, making it easier for users to access the resource or for backwards compatibility with old URLs.
Apache server Restart
Every configuration update in Apache will require a restart of the server. A better option is to reload the server without restating which gracefully reloads the config without the restart cycle.
#To restart or reload the Apache web server on Ubuntu\Debian, you can use the systemctl command:
sudo systemctl restart apache2
sudo systemctl reload apache2
#On CentOS, you can use the systemctl command as well:
sudo systemctl restart httpd
sudo systemctl reload httpd
##Note that on some older versions of CentOS, you may need to use the service command:
sudo service httpd restart
sudo service httpd reload
Modules Settings – MPM
Apache MPM (Multi-Processing Module) is a module that determines how Apache handles incoming requests and distributes the workload across multiple processes or threads. Different MPM modules configuration has different capabilities and performance characteristics, so choosing the right one is crucial to the efficiency and stability of your Apache server.
To set up the Apache MPM module correctly, follow these steps:
- Determine your server’s hardware specifications and the type of workload your server will handle.
- Choose the appropriate MPM module for your setup based on your workload requirements.
- The most commonly used MPM modules are prefork, worker, and event.
- Install the chosen MPM module by including it in the Apache build configuration or installing it as a module.
- Configure the MPM module by setting the relevant directives in the Apache configuration file.
- The most important directives include StartServers, MinSpareServers, MaxSpareServers, MaxRequestWorkers, and MaxConnectionsPerChild.
- Test your Apache configuration to ensure that the MPM module is set up correctly and that your server is handling requests efficiently.
#Example prefork config
<IfModule mpm_prefork_module>
    StartServers 10
    MinSpareServers 10
    MaxSpareServers 30
    MaxRequestWorkers 250
    MaxConnectionsPerChild 4000
</IfModule>
The configuration above sets the following options:
StartServers: The number of child server processes to start at server init.
MinSpareServers: The minimum number of idle child server processes.
MaxSpareServers: The maximum number of idle child server processes.
MaxRequestWorkers: The maximum number of child server processes that will be created to handle requests.
MaxConnectionsPerChild: The maximum number of connections a child process will handle before it is terminated and a new child process is created. A value of 0 means that there is no limit.

Apache Prefork versus Worker
The Apache process types are a generalization of how Apache operates. There are two main modes:
- Prefork is the default mode and uses one master/parent process for each child worker. This means that when you need to scale out your service, all you need to do is add more children (worker processes). This makes it the fastest mode but also creates a lot of threads and memory usage on the server.
- The worker uses multiple worker processes that share their parent’s resources with one another. Since they’re sharing resources, this can lead to increased latency in some cases (such as serving static content).
Apache Keep-Alive Directive
Apache HTTP server’s “KeepAlive” directive is used to control whether multiple requests can be sent over the same HTTP connection by keeping the connective alive until certain timeput. When KeepAlive is set to “On”, it allows multiple requests to be sent over the same connection, resulting in a faster and more efficient transfer of data.
KeepAlive On
MaxKeepAliveRequests 100
KeepAliveTimeout 15
- KeepAlive directive to “On”
- specifies the maximum number of requests to allow over a single connection to be 100 before it gets reset.
- Sets the time-out value for KeepAlive connections to 15 seconds.
Modules Settings – Core
Core Apache modules are modules that are included in the Apache distribution and provide essential features for serving web content.
- mod_dir: provides support for directory-index files and handling of directory URLs.
- mod_log_config: provides support for logging requests and access to log information.
- mod_mime: provides support for content negotiation and handling of different file types.
- mod_rewrite: provides support for URL rewriting and redirection.
- mod_alias: provides support for URL mapping and redirection.
Core Apache settings are configurations that are essential to the operation of the Apache server.
- ServerRoot: specifies the root directory of the server system files
- Listen: specifies the IP address and port on which the Apache server for incoming requests.
- DocumentRoot: specifies the root directory of the web content that the Apache server serves.
- ErrorLog: specifies the location of the Apache error log file.
- LogLevel: sets the verbosity of the Apache log messages.
- KeepAlive: specifies whether or not to allow persistent connections.
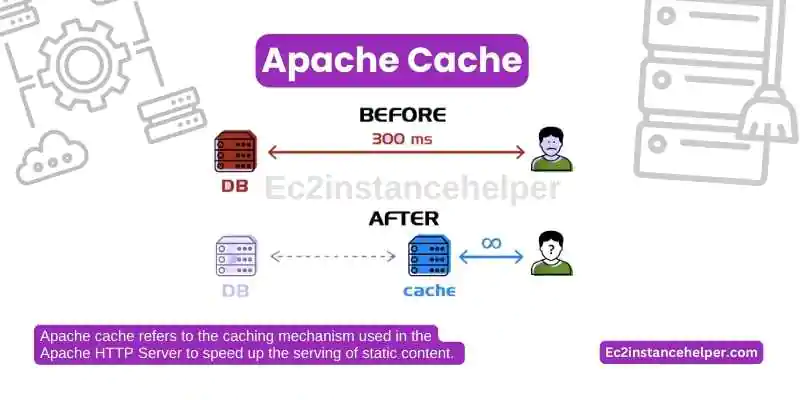
Apache Cache
Apache cache refers to the caching mechanism used in the Apache HTTP Server to speed up the serving of static content. When content is cached, it is stored locally on the server so that it can be served to clients more quickly when they make a request for the same content.
Below is an example of the Apache Cache setting:
<IfModule mod_cache.c>
   CacheQuickHandler off
   CacheLock on
   CacheLockPath "/var/cache/mod_cache-lock"
   CacheLockMaxAge 5
   CacheIgnoreHeaders Set-Cookie
   CacheIgnoreNoLastMod On
   CacheStoreNoStore On
   CacheStorePrivate On
   CacheDefaultExpire 1000
</IfModule>
- The above configuration will enable caching with a default expiration time of 1000 seconds for all static content. You can adjust the CacheDefaultExpire value as needed for your specific use case.
- It’s important to note that the cache configuration should be used with caution and thoroughly tested, as it can have an impact on the overall performance of your web server and the accuracy of the cached content.
Apache Security Tips
Here are a few Apache configuration tips to improve the security of your web server:
- Keep the Apache software and modules up to date.
- Disable directory indexing: you can disable directory indexing by adding the following to your Apache configuration file:
Options FollowSymLinks
- Set secure file permissions for all web content and configuration files to limit access to sensitive information. For example, set the permissions on your Apache configuration file to 640 or 600.
- Use SSL/TLS encryption to secure data transmitted between the web server and client.
- Disable unnecessary Apache modules: Disable any Apache modules that are not required
- Consider using mod_security, an open-source web application firewall
These are just a few examples of the ways in which you can improve the security of your Apache web server. It’s important to regularly review your configuration and keep up-to-date with best practices.
Apache Security – Mod evasive module
- mod_evasive is an Apache module that detects and blocks a variety of common hacker attacks against websites.
- mod_evasive works by monitoring the number of requests per second that are being made to a website.
- mod_evasive monitors all IP addresses and if it detects any anomalies, it can automatically block the IP address for a preset
Below is an example configuration for the Mod Evasive module
<IfModule mod_evasive24.c>
    # The hash table size defines the number of top-level nodes for each child
    # hash table. Increasing this number will provide faster performance by
    # decreasing the number of iterations required to get to the record, but
    # consume more memory for table space.
    DOSHashTableSize        3097
    # If set, this email address will receive a notification whenever an IP
    # address becomes blacklisted. A locking mechanism prevents continuous
    # emails from being sent.
    DOSEmailNotify            admin@email.com
    # Allow up to 2 requests for the same URI per second:
    DOSPageInterval            2
    DOSPageCount               10
   # Allow up to 70 requests across the site per second:
   DOSSiteInterval              1
    DOSSiteCount 70
    # Once the client is blacklisted, prevent them from accessing the site
    # for 20 seconds:
    DOSBlockingPeriod 20
    DOSLogDir           "/var/log/mod_evasive"
</IfModule>
Modules Settings – URL Rewrite (mod_rewrite)
Mod_rewrite is a module for the Apache HTTP Server that provides a way to perform URL manipulations. The mod_rewrite module uses a rule-based rewriting engine to rewrite requested URLs on the fly. Here are a few examples of how mod_rewrite can be used:
#Redirecting all HTTP traffic to HTTPS:
RewriteEngine On
RewriteCond %{HTTPS} off
RewriteRule (.*) https://%{HTTP_HOST}%{REQUEST_URI} [R,L]

#Removing the www prefix from URLs:
RewriteEngine On
RewriteCond %{HTTP_HOST} ^www\.(.+)$ [NC]
RewriteRule ^(.*)$ http://%1/$1 [R=301,L]
Modules Settings – HTTP Headers (mod_headers)
Mod_headers is a module for the Apache HTTP Server that allows you to control the HTTP headers sent by the server. You can add, delete, or replace HTTP headers using mod_headers.
Here are a few examples of how mod_headers can be used:
#Setting the X-Content-Type-Options header:
Header set X-Content-Type-Options "nosniff"
#Setting the X-XSS-Protection header:
Header set X-XSS-Protection "1; mode=block"
#Setting the Strict-Transport-Security header:
Header set Strict-Transport-Security "max-age=31536000; includeSubDomains; preload"   ## 1 year
#Setting the Cache-Control header:
Header set Cache-Control "private, max-age=0, no-cache, no-store"
These are just a few examples of what can be done with mod_headers. With this module, you have fine-grained control over the HTTP headers sent by the Apache HTTP Server, allowing you to implement security measures, improve performance, and customize the behavior of your website.
Modules Settings – HTTPS Headers (mod_ssl)
Mod_ssl is a module for the Apache HTTP Server that provides support for the Secure Sockets Layer (SSL) and Transport Layer Security (TLS) protocols. With mod_ssl, you can secure your Apache HTTP Server with encrypted HTTPS connections.
Here is a basic configuration example for mod_ssl. This config can into the main conf file as a virtual host but the best practice is to add it to ssl.conf which resides in conf.d folder.
Make sure to add the below line to your main httpd config file.
Include conf.d/*.conf
Listen 443
##below content added to ssl.conf
<VirtualHost *:443>
  SSLEngine on
  SSLCertificateFile /path/to/cert.pem
  SSLCertificateKeyFile /path/to/cert.key
</VirtualHost>
Restart the Apache HTTP Server: After making the configuration changes, you need to restart the Apache HTTP Server for the changes to take effect.
This is a basic example of how to configure mod_ssl, you would also want to add more security measures, such as using a stronger cipher suite, enabling HTTP Strict Transport Security (HSTS), and configuring a certificate chain.

Apache Tomcat – Quick Intro
Apache Tomcat is an open-source web server and servlet container developed by the Apache Software Foundation. Tomcat implements the Java Servlet and JavaServer Pages (JSP) specifications and is used for deploying Java-based web applications.
Apache Tomcat provides a platform for running Java-based web applications and includes features such as a dynamic request processor, a JSP engine, and support for the Java Servlet API. With Tomcat, you can deploy and run Java web applications, and use Java as the programming language for creating dynamic, interactive web pages.

FAQ – Apache Configuration
Where is the Apache server config file located?
The location of Apache server configuration files can vary depending on the operating system and the specific installation. These config file locations are just default norms and may change for a specific system settings.
- Linux (Ubuntu, Debian):
- Main configuration file: /etc/apache2/apache2.conf
- Additional configuration files (included from
apache2.conf):/etc/apache2/conf-available/and/etc/apache2/conf-enabled/ - Virtual host configurations:
/etc/apache2/sites-available/and/etc/apache2/sites-enabled/
- Linux (CentOS, Red Hat):
- Main configuration file: /etc/httpd/conf/httpd.conf
- Additional configuration files (included from
httpd.conf):/etc/httpd/conf.d/ - Virtual host configurations:
/etc/httpd/conf.d/or/etc/httpd/conf.d/vhosts/
- macOS (using Homebrew):
- Main configuration file: /usr/local/etc/httpd/httpd.conf
- Additional configuration files:
/usr/local/etc/httpd/extra/ - Virtual host configurations:
/usr/local/etc/httpd/extra/httpd-vhosts.conf
Where are the Apache server errors and access Log files?
Here are some common locations for Apache log files:
- Linux (Ubuntu, Debian):
- Error log: /var/log/apache2/error.log
- Access log: /var/log/apache2/access.log
- Linux (CentOS, Red Hat):
- Error log: /var/log/httpd/error_log
or /var/log/httpd/error.log - Access log:
/var/log/httpd/access_logor /var/log/httpd/access.log
- Error log: /var/log/httpd/error_log
- macOS (using Homebrew):
- Error log:
/usr/local/var/log/httpd/error_logor/usr/local/var/log/httpd/error.log - Access log:
/usr/local/var/log/httpd/access_logor/usr/local/var/log/httpd/access.log
- Error log:
It’s worth mentioning that the log file names and paths can be modified in the Apache configuration file (httpd.conf) using the ErrorLog and CustomLog directives, allowing for flexibility in log file management.
How to setup www to non-www redirection in Apache and vice versa?
To set up a redirection from “www” to “non-www” or vice versa in Apache, you can use the mod_rewrite module and create appropriate rewrite rules. Here’s how you can achieve both scenarios:
- Redirect from “www” to “non-www”:
- Open your Apache configuration file (
httpd.confor an appropriate virtual host configuration file). - Locate the
<VirtualHost>block that corresponds to your domain, and add the below config.
- Open your Apache configuration file (
RewriteEngine On
RewriteCond %{HTTP_HOST} ^www\.yourdomain\.com$ [NC]
RewriteRule ^(.*)$ http://yourdomain.com/$1 [R=301,L]
Save the changes to the configuration file and restart Apache for the changes to take effect.
- Redirect from “non-www” to “www”:
- Follow the same steps as above to locate the
<VirtualHost>block for your domain. - Inside the
<VirtualHost>block, add the following rewrite rule:RewriteEngine OnRewriteCond %{HTTP_HOST} ^yourdomain\.com$ [NC]RewriteRule ^(.*)$ http://www.yourdomain.com/$1 [R=301,L]Save the changes and restart Apache.
- Follow the same steps as above to locate the
What could be the implications of getting the message on the Apache server “403 Forbidden You don’t have permission to access / on this server”?
The message “403 Forbidden You don’t have permission to access / on this server” indicates that the server received the request, but the requested resource is forbidden to be accessed by the user.
Here are some possible implications or reasons for encountering this error:
- Misconfigured .htaccess file: If there is a misconfiguration or error in the
.htaccessfile, it can cause the server to return a “403 Forbidden” error. - Directory listing disabled: The server may be configured to disallow directory listing, meaning that when a request is made to access a directory without specifying a file, it will result in a “403 Forbidden” error
- Insufficient permissions – The user making the request does not have the necessary permissions to access the requested resource or directory. This could be due to incorrect file or directory permissions on the server.
- Incorrect directory index settings – If the server is configured to serve a directory without specifying a particular file, such as
http://example.com/, and there is no index file (e.g.,index.html,index.php) in that directory, it can result in a “403 Forbidden” error. - Client Security Policy – Access to requested resources is restricted by a CSP rule or directive.
- IP or access restrictions – The server may be configured to restrict access to certain IP addresses or ranges. If the user’s IP address is not allowed, it will result in a “403 Forbidden” error.
- Authentication required: The server may require authentication (such as username and password) to access the requested resource.